Showing posts with label Honey Ryder project and repairs. Show all posts

Sunday, January 14, 2018

Tom's Trinidad Work Station


Tom's secure work station ashore

Oct 2017
Tom's secret work station - not really

Tom is the detail guy on our boat.  Anything that requires great and exact detail, usually falls to him.  Brightwork falls in the category.  He actually enjoys it.
sv Honey Ryder companionway stairs

Doing brighwork while living on the boat is a challenge.  There for Tom set up a work station ashore.  This would allow him to strip, sand, and varnish without the danger of someone (me) accidentally touching it. 
Sheltered from wind and rain

He had leftover "texture" from our deck painting so he used it in the varnish on the top of the stairs.  It turned out really nice and gives the stairs "gripping" power.
Temp step - a dozy


Brightwork is looking good around sv Honey Ryder.

Saturday, January 13, 2018

Chainplates


Chainplates

November 2018

We have known for some time that our chainplates are leaking.  Not gushing or dripping but leaking.  We could see water damage on the wood trim.  PULL AND INSPECT CHAINPLATES has been on our TO DO list for some time.  But it is an intimidating project. 

Chainplates are what hold up the rigging on a boat.  They are attached to the hull by various methods.  On some boats, they are hard to access and inspect.  We can see ours from above and below.  This is a good thing.  Thank you Caliber.  The only part we can’t see is the part that goes through the deck and the part against the bulkhead.  But despite being easy to see and access, it is still a daunting project. 
One out, on the far right is the next one in line

But we HAD to do it.  Tom marked the forward, port side wire stay tension with tape and then undid the forward port chainplate.  Next he loosened all the bolts below, inside the boat.  It didn’t pull right out.  That is probably a good thing.  Tom had to work at it but finally got it out.  It had surface rust and pitting but nothing too bad.  Tom worked at cleaning up the hole and I worked at cleaning up the chainplate itself.  Longtime cruisers Mark and Bruce both took a look at it.  Mark = “I would put that back in my boat, no worries.”  “ Me too” said Bruce.  Mark went further “If this was a race car I would put that back in.”  He used to work on race cars.   Bruce added “If this were my plane, I would put that back in.”  He used to fly.  No worries.  Okay.   
Chainplates

Tom ordered and brought down butyl tape in preparation of tackling this project.  It is like really sticky Play-dough that is smoothed out into tape.  Tom put several wraps around the chainplate and then re-inserted it back into the deck.  The butyl tape smashes down and smooches into all the places it needs to stick.  Tom then screwed down all the deck bolts and ones below as well.  This took some doing with a big bunch of mashed up butyl but that is the idea. 
Butyl tape

Then he did the did the forward starboard chainplate.  Same sequence.  Again, minimal surface rust and a tiny bit of pitting.  Nothing serious and NO cracks.  Cracks are bad, very bad.  Cheers to Caliber as these chainplates are well designed to hold up.  Beefy suckers.  In visiting with other cruising friends with similar age or older boats, nearly all have pulled their chainplates.  Some had to replace one or two.  A few people have re-bed theirs a couple of different times to keep the water out.  At least one Caliber owner and I suspect two (engineers who have to be working on SOMETHING on their boats) decided to replace all when one was a little suspect.  Okay – to each their own.  We were pleased at the condition of ours once we got into it and understood. 
We continued along, pulling chainplates, inspecting, cleaning up and re-bedding.  It usually took one day for each one.  Throw in some rain for added fun and we took nearly a week to complete.
See the grey butyl tape

See the grey butyl tape

On the aft chainplates on each side we did find a itty-bitty bit of wood rot in between the fiberglass.  I thumb nail size amount.  Tom dug it out and then filled it back in with epoxy.  Good as new. 
The white is the epoxy
It was comforting to know we had checked all the chainplates completely and re-bed them when on our first passage of this season we were pounding to windward.  Interestingly, the boat even sounded a tad different below during that sail.  It was probably in my head but it was a good feeling to have this checked off our list.    

Raising the Waterline

Waterline raised

Sailboats are pretty.  Think about it.  They are often used as scenery in movies, pictures, calendars, condo and resort properties and event spaces like weddings…..”Our daughter got married at The Cotillion Ballroom near the marina with all the sailboats in the background.”  When searching for your own sailboat, looks is an important factor.  Is she appealing to the eye?  To that specifically, many naval architects and boat builders put stripes on the side of the boat.  Usually one at the top, just under the toe rail and then a few near the waterline.  On sv Honey Ryder we have that exact configuration:  one 2 inch green stripe under our toe rail and then three at the waterline.  Along the waterline it goes -  bottom paint, 1 inch break of gel coat, 2 inch green stripe, break of 1 inch gel coat and then another 2 inch green stripe which ends up looking like 6 stripes total of green and ivory. 
The striping is eye catching but a pain in the ass.  Well, not all of it, but bottom 1 inch stripe of ivory gel coat.  It ends up dirty / gross because it is exposed to the water through wind, swell, current and such at anchor and while sailing.  The slime happens because it is straight gel coat, no bottom paint. 
During the season we try to keep the bottom clean on a regular basis by scrubbing it lightly with a nylon scour pad or plastic scraper to keep any growth from becoming permanent.  This troublesome 1 inches of gel coat takes extra attention and time.  Consequently, it looks like hell come mid to late season. 

I had finally had it.  “Why don’t we raise the waterline?  Get rid of this 1 inch gel coat stripe all together.  Bingo!  
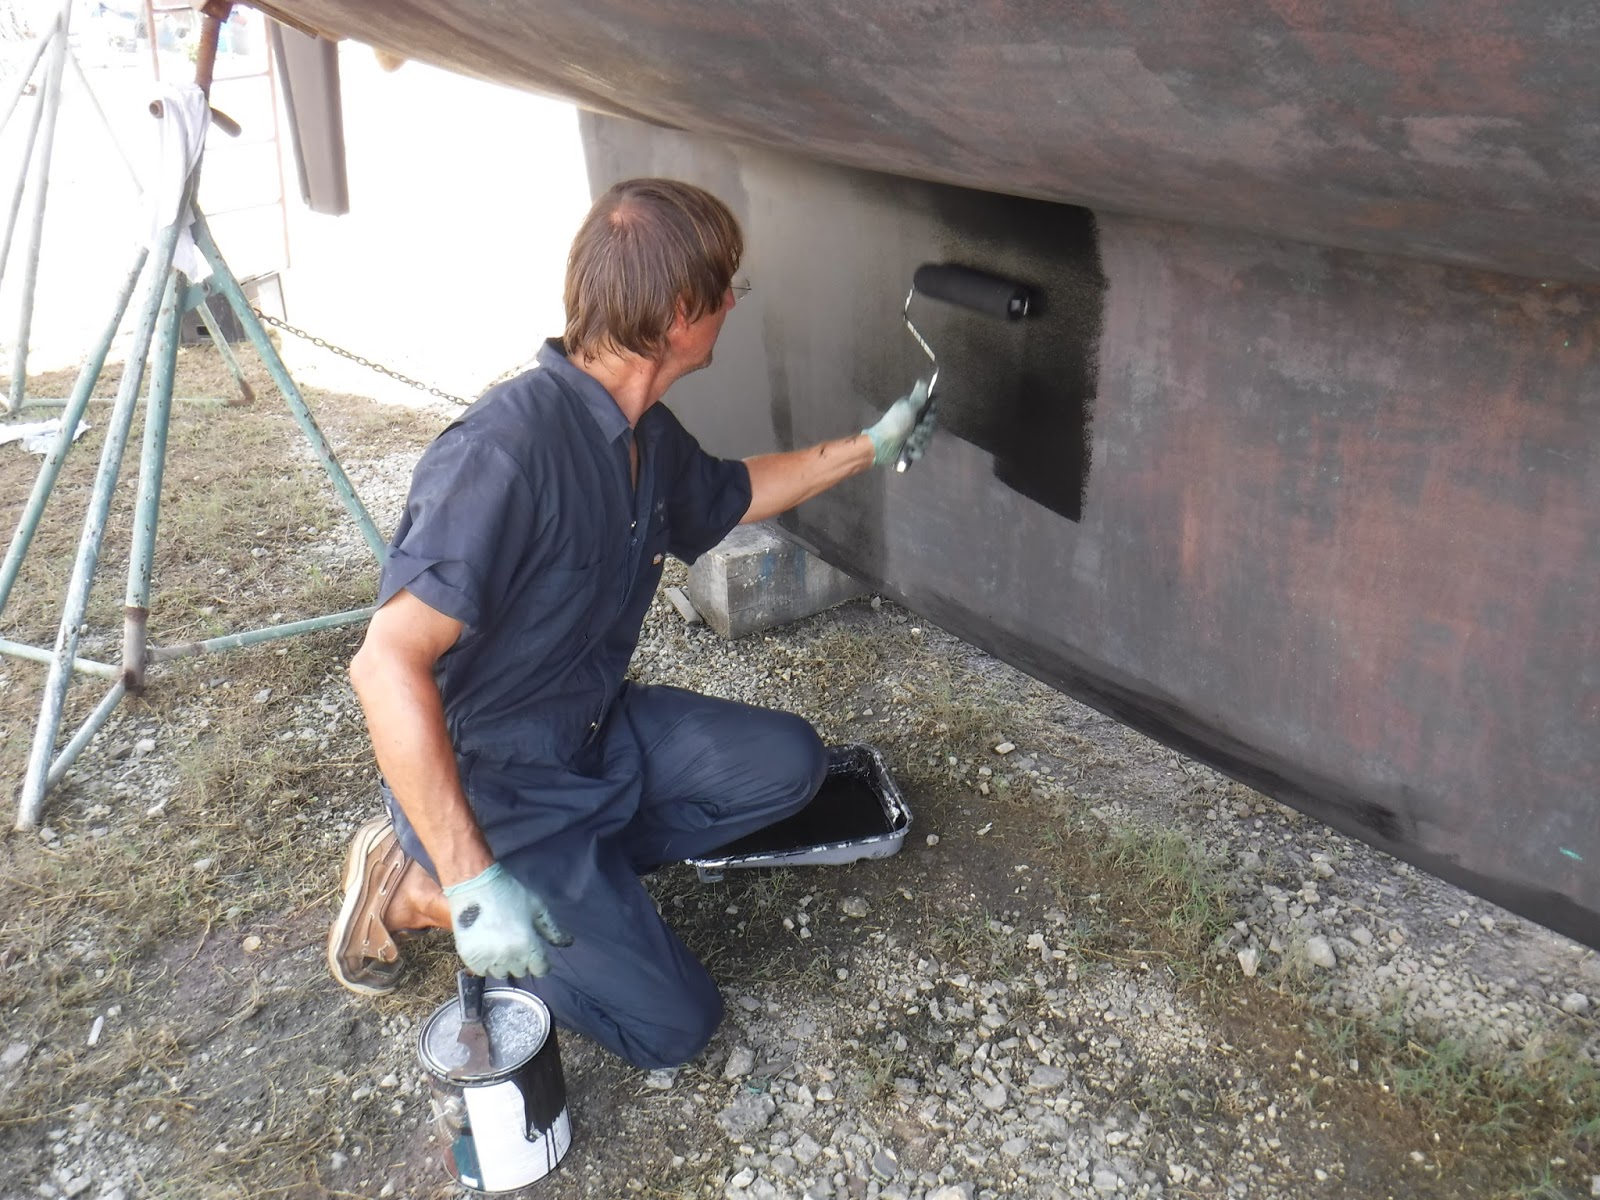
Problem solved." Tom agreed.  When we hauled out this hurricane season to do the bottom, that is exactly what we did, raised the waterline. 

For you non-boaters, raising the waterline simply means you move the edge / line of the bottom paint up.  We painted over the 1 inch gel coat strip and now it is bottom paint.  This is usually only done when a boat is overloaded and thus sits lower in the water, causing the natural waterline to be higher than the intended one.  This is NOT the case on sv Honey Ryder.  While at times it seems like we have too much stuff inside the boat, our waterline was not stressing.  In fact, when she sits in the water in flat, calm conditions, we don’t even come close to the top to the waterline.  However, most anchorages have a little wave action of some sort.  We rock side to side at anchor. 

Moving the waterline up is not hard but not as simple as slapping some paint on there.  The new waterline had to be taped off.  Given it would now come up to the 2 inch green stripe, it had to be tapped off very carefully aka exact.  Anything EXACT is done by Cap10 Tom.  He is Mr Exact.  I am NOT Mrs Exact.  Then the gel coat had to be super clean with acid to remove any and all dirt and such.  Then it was lightly sanded to open up the gel coat surface so it would except the epoxy primer and bottom paint, then finally wiped down to remove the sanding bits. 

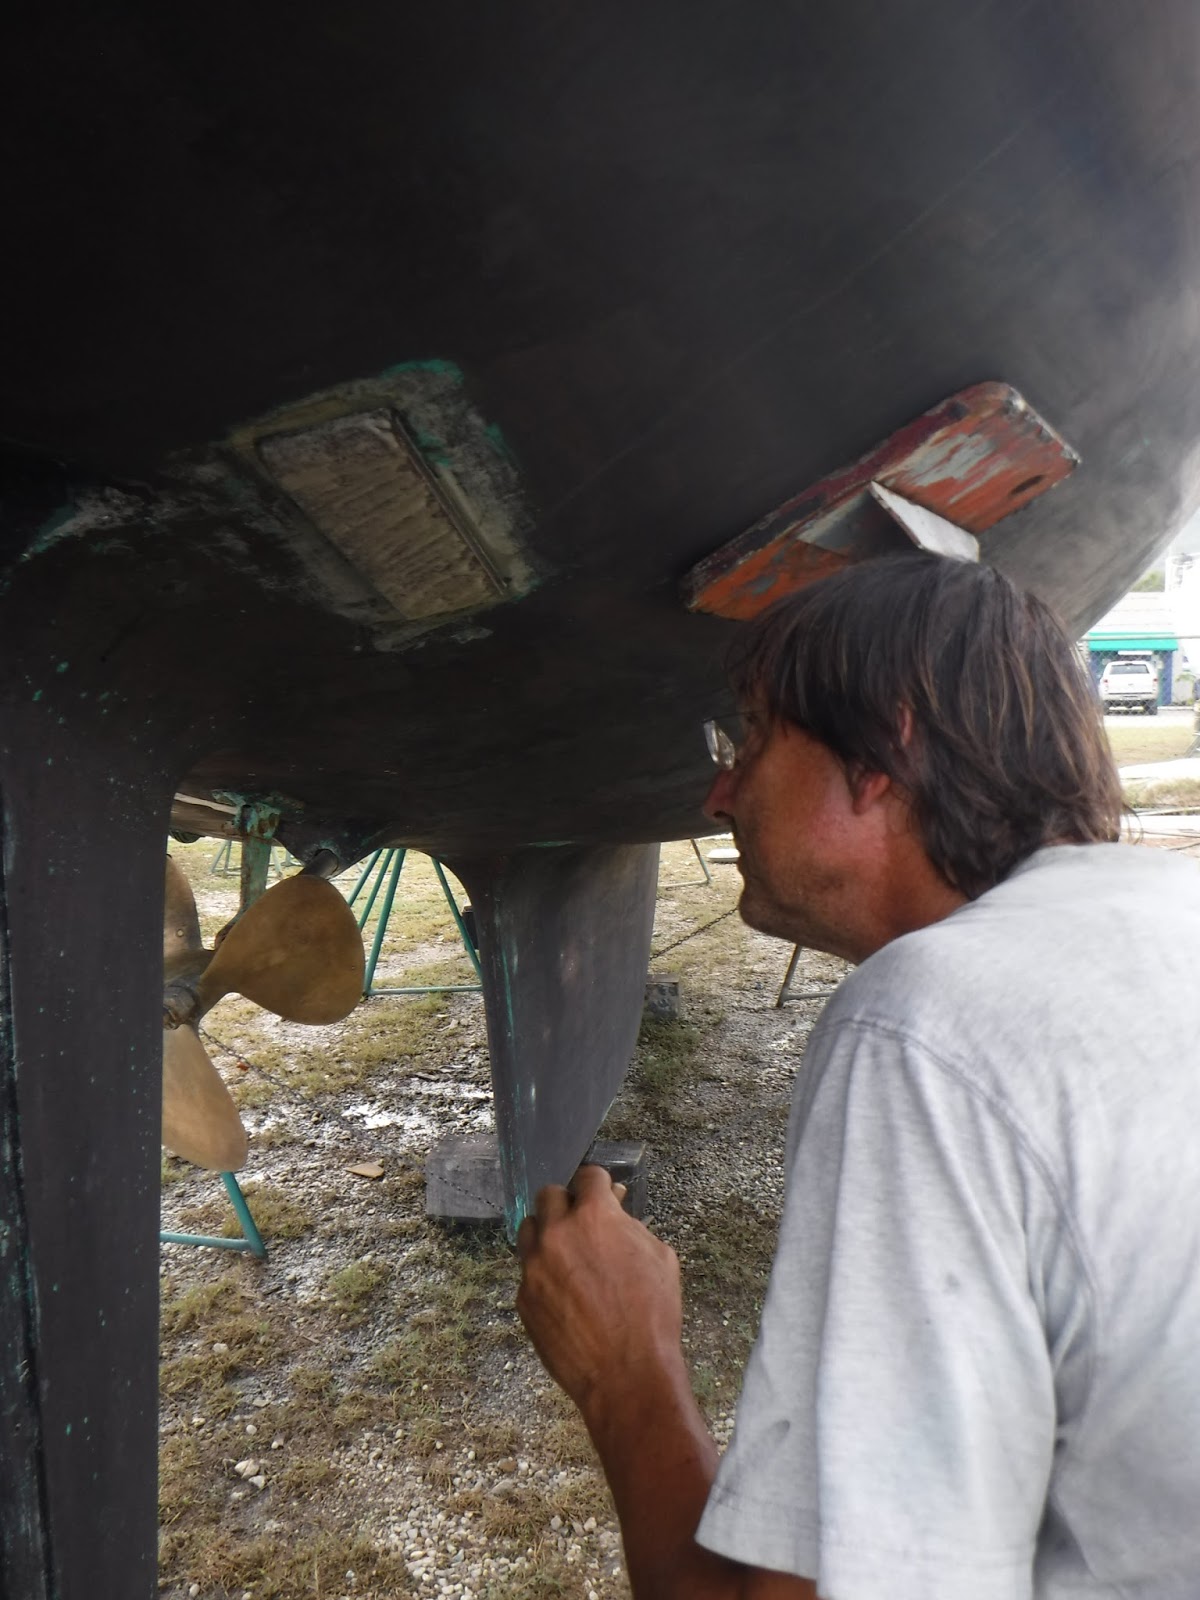
When we rolled the bottom, this new area was included.  On the starboard side, it splits two thru hulls exactly in half.  That was a bit odd but we taped those off at exactly the halfway and it looks fine. 
In fact, the whole thing looks great.  We should have done this from the start.  The remaining stripes are still eye catching.  The only difference is there isn’t a dirty, slimy gel coat strip any longer.  Very happy with the results. 


As I look around at other cruising boats, it seems nearly all have the decorative configuration we had and all of their gel coat stripes are filthy like ours used to be.  I have to wonder what the builders were thinking.  Obviously, they never had to keep their boats clean for a whole season in the tropics.  Grrrrr.  And I wonder why more cruisers haven’t raised their waterline to eliminate this?  I have spotted a few boats that have.  They seem to be world cruisers who have made extensive changes to their boats based on thousands and thousands of tried and true sea miles.  Hum?  I wonder what else we can learn from looking closer at these hardy, experienced boats?

Life On The Hard 2017 - Yard Life

Peter and Reinhardt confer 

Dec 2017

We are less than 25 yards away from the water and yet, a world away.  Life on the hard is so totally different.  People in the yard don’t even socialize much with people in the water.  I am not sure why other than being on the hard usually means BIG tasks, chores, projects.  Everyone is focused.  There is socializing but a different type. 

Like other cruising social situations, on the hard, we meet easily and quickly become acquainted and even fast friends.  It is a situational thing.  They are hammering away, scraping, sanding, covered in sweat and so are we.  Misery loves company perhaps. 
Richard and Estelle

But there is also support.  “Do you have a palm sander?”  “Can I borrow your caulking gun?”  “Are you still using the scaffolding?”  “Let me help you carry the scaffolding to your boat.”  Traditional pink and blue roles usually fade away.  Everyone sands, everyone waxes, everyone varnishes….well not me.  I am not detailed enough so Tom does our brightwork but in general, everyone works.  The young French Canadian couple next to us, she was running the electric saw and sander as she was re-building their interior while he sanded and painted the bottom.   Pink and blue be damned.
sv Traquillo getting ready to go in

Now I say everyone, however, some people hire out different chores while on the on the hard.  Labor prices in Trinidad are good so many people hire out the bottom sanding and painting.  Same hire the  compounding and waxing.  Some projects require expertise like painting the boat or welding.  Others hire help but work along side.  We did this with Steve.  He helped us sand, compound and wax the sides since we had the oil spill stains to deal with.  However, later in the week I insisted we put a different coat of finishing wax on so Tom and I did that by ourselves.  All the other work, we did.  At this point we prefer to do the work ourselves so we know what is what.

The Brazilians going in

There is another type of support on the hard.  Moral support.  As I stated, we quickly get to know our fellow yard cats.  We encourage one another disipite language barriers.  “Wow, looking good.”  “You are really making progress.”  “Well at least you got all the blisters sanded, the rest is a piece of cake.”  Sometimes a stroll around the yard helps clear your head, ease your muscles and gives you renewed hope.  Nicknames develop.  Our German friend Peter had been on the hard much longer than us.  He knew everyone in the yard.  He gave us the lowdown on everyone.  He called the young Canadians Fire Flies because they worked into the night using headlamps that gave them the appearance of Fire Flies.  Cute!  His German friend was getting a lot of work done before launching.  The other German had massive blisters and decided to peel and then have it re-gel coated.  Luka the Italian got his boat painted. The Dutch guy was doing a mini re-fit.  The New Zealand boat is for sale and thus painted as well but they will sail it until it sells.  The Brazilian boat was welding up a storm for weeks while a crew member sewed new cushion covers by the pool.  They would be launching soon.  And so on and so forth.  
The Brazilians headed for SPLASH

When someone was launched we all celebrated with them, congratulating them.  When the travel lift fires up, it is loud.  Everyone looks to see who is going in.  “You’re going in?  Terrific.  Cheers to you.”  We all do the same routine.  The travel lift picks you up and slowly makes its way to the water.  The captain and crew walk along behind taking pictures and video of the exciting day.  We all give them a thumbs up and Okay signs as they pass.  Once in the water, the crew will come get their final bits and pieces from where the boat was on the hard and then they are gone.  I don’t mean sailed off gone, although sometimes they do.  I mean, they don’t come back to the yard or rarely.  Instead they keep to the docks and walkways.  It’s just how it is.   

Life On The Hard - Fridge, Freezer, Head, Yard Clothes.


Dec 2017

Our fridge and freezer work using seawater.  Being on the hard means being out of the seawater.  Tom thought long and hard and came up with a plan.  He remembered a conversation with Stefan on sv Tango who converted a spare water tank for  his freezer/fridge.  It circulated fresh water rather than sea water and worked just fine.  Tom filled a five gallon bucket of water and placed it in the cockpit locker and re-routed the cooling water intake to draw from the bucket.  The outflow went back into the bucket creating a closed system.  This system worked like a charm for the seven days on the hard and meant that we didn't have to thaw out our frozen food.

We also use seawater to flush our heads.  We can use fresh but we didn’t want to use all our fresh water up and more importantly, we didn’t want to fill the holding tank even though we have a big one.  Thus, we used the marina facility.  This meant up and down the ladder.  Actually, it wasn’t too bad as we were on the ground most of the time or on the scaffolding.  Additionally, we were sweating so much that no matter how much water we drank, we didn’t have to pee very often.  However, at night it's a different matter.  Many people have to pee during the night.  As we age, this becomes a given.  Luckily, it is not too bad yet for us.  However, have you ever tried to NOT think of doing something?  Yep, it makes you want to do that thing even more, right?  So reading this right now, try to not ask yourself “Do I have to pee?”  Just tell yourself you don’t.  “I do not need to pee.”  “I am fine.”  I can wait until I get up next time before I need to go.”  You have to go now don’t you?  Yep, go ahead.  I’ll wait.  You back?  Anyway, night time becomes a challenge.  Many cruisers use a bucket during the night and then dump it in the morning.  I know, I know....TMI, but I am just telling the truth.  I myself have gotten up in the middle of the night because I couldn’t stop thinking of NOT peeing and thus then had to go, thrown something on, crawled down the ladder and traipsed off to the marina bath house.  This explains some of the weird things you see people on the hard wearing late at night or early in the morning;  shirts inside out, PJ bottoms.  One Italian guy wore his robe to and fro. 
Blue Team

Speaking of clothing, cruisers all have Yard Clothes. There are grubby work clothes.  More often than not, they are tossed in the trash after the boat is splashed.  We have yard clothes but we also have our sv Honey Ryder, navy Dickie coveralls!  Yes, we be styling.  Local Nigel keeps teasing us by calling us "Blue Team".  But we didn't mind, it was nice to strip those off at the end of the work day and not be quite as covered in dust, paint, dirty and such.  

Life On The Hard 2017 - Aches and Pains


Dec 2017
I have told you before about life on the hard…..that it is hard.  It is painful too. 

The ladder – The boat is out of the water on jackstands.  We have a steel ladder propped up against the stern and tied off so it won’t go anywhere.  The rungs are round steel, hot in the tropical sun and uncomfortable in shoes and barefeet.  We climb up and down it each time we want to get in and out of the boat – something like 10-20 times a day…up and down the ladder.  By the second day I am feeling my “ladder climbing muscles.”

There is also scraping, sanding, compounding, waxing muscles screaming hello.
There are other pains as well.  Each of us has smacked our head more than a couple of times under the boat as we work.  The other day I was purposely keep my head down so I wouldn’t smack it and ran head first and face first right into the scaffolding board.  Bam!  I now have a huge pop-knot on my forehead that hurts like a @#&$*!  It’s big too.  It could probably have its own zip code.  So much for not smacking my head!  Yes, grace in action....that is me!  

The workstations – Each boat sets up a ground workstation of some sort.  Usually it consists of table or workbench where working tools of the day are kept.  Ours was simple – two big wood blocks to hold up a wood plank.  We keep ours under the boat.  Our German friend Peter set up his workstation in front of his boat along the fence line.  He had a tarp for shade and a work cabinet.  He had two broken down chairs – one for him and another for visiting friends.  He even painted his boat name sv Tranquillo on his workstation in a fit of silliness.  
The filth - The yard is dirty, dusty and then muddy when it rains.  Our tasks are dirty jobs;  scraping and sanding the bottom, compounding, waxing, polishing, painting, etc….  Bottom paint is toxic and gets ….everywhere.  We wear protection but even still.  My nails are shredded.  Our hands are rough as the 60 grit sandpaper we are using.  Try as we might, all this gets drug up the ladder on our shoes and clothes and into the jumbled cockpit and even below. 


WARNING – Rant coming
To add injury to insult, Coral Cove has been having “water challenges” as in no water at times.  We knew this going in but decided to roll the dice.  We gambled wrong.  So wrong.  Silly us.  The water issues popped up again while we were on the hard.  We needed water to work – sanding, compounding, etc….plus to clean up.  Nothing worse than being covered in a mix of toxic dust and your own sweat and no water for the showers.  NONE!  To say I was pissed off would be the understatement of the year.  Even when we did have water, the pressure was mild to low.  Again, not good for working on your boat on the hard.  One evening after a tough day and little to no water, I was fuming and determined to storm the office in the morning to voice my displeasure.  Another cruising friend on FB talked me down.  “I thought you were keeping your cool in case something goes wrong and you need the yard to help you get an extension?”  See, our 90 days visas were coming up in a couple of weeks.  We plan to sail out before then but if we ran into an unexpected issue (what could go wrong on a boat – ha!) with the boat, we would need an extension and the yard/office would need to supply the necessary paperwork to get one.  Yes, I needed to chill.  I am SO glad my friend (Thank you Willie) talked me down.  Another cruiser didn’t have a friend to talk her down.  She let the cruising world in Chaguaramas know Coral Cove didn’t have water and how unhappy she was about it on the morning net.  She was promptly called into the office and told they were launching her boat immediately and she could go elsewhere!  Of course her boat was not ready for launch.  She ended up apologizing on the radio for her comments (even though they were 100% correct) so they wouldn’t kick her out.  That is some bad joo joo my friends.  So I kept my mouth shut and we struggled through the water issues. 

Each day we clicked off the TO DO WHILE IN THE YARD list.  One week later we splashed.  Free!  Whew!  No, I did not march up the office then either.  We still needed to get some items completed.  Instead, I kept my mouth shut and we focused on the last items so we could sail away.
I am pretty proud of our 7 day turn around.  A few have done it in less but most take longer in the yard.  Coming up next – Life on the Hard  - yard life. 


Sabrina's Sail Loft - BBQ Cover


Our new BBQ grill needed a cover.  

I had leftover Sunbrella fabric in Sunbrella forest green.  But not quite the right size so I sewed some pieces together.  

I used Julie Gifford's book.  She has a detailed description on how to make your own BBQ grill cover.  SUCH a good book.  A must have onboard!

Worked like a charm.  It took me a full day to make this.  I did make a test one out of muslin but to be sure, so a couple of days.


When I  was done, I sprayed it with 303 fabric protector.  

Tuesday, January 9, 2018

Sabrina's Sail Loft - Sewing Muscles


Oct 2018

The headsail stitching has come loose again on the sacrificial.  Simple repair but then my Sailrite starts acting up.  I check all the usual things I am supposed to check.  They are ok.  I ask the Sailrite Facebook group.  I am very detailed in letting them know what I have already checked and tried.  Many go ahead and suggest those same things despite my detailed post.  Sigh!  I contact Sailright directly via email.  I explain in detail and mention that I don’t have the bandwidth for videos.  They reply back, suggesting I look at the video links below.  Sigh.  I email back “While I really do like your videos and find them helpful under normal circumstance, I DO NOT have the bandwidth now or in near future to watch, can you email me instructions?"  They reply back with links to videos.  UGH!  I email back again, this time I am not as ….nice.  They send printed instructions on advanced troubleshooting.  It turns out the paddle behind by tension mechanism is slightly bent.  Tom fashions a longer one, therefore adjusting for the slight bend and I am back in business.
While sewing up at the pool area is nice in terms of having the room to work, it is also a pain because I have to haul everything up there…..Sailrites are HEAVY.  Plus sewing in public then opens you up for all the questions and comments….”Oh, what are you working on?  Will you repair my sail, bimini, dodger, etc…. I have a tiny repair, please?”  So I opted to sew below on sv Honey Ryder.  With the table down, I actually have quite a bit of space.  Or I thought so until I had to restitch the headsail.  Oh mon.  That sucker is big. 

This brings us to the subject of sewing muscles.  Sewing sails and other big objects, I find I use my whole body, activating sewing muscles I have not used in a while.  For the head sail, I have my left arm up at shoulder height at ninety degree angle, letting the sail rest on it and thus lining it up even and flat to be pulled into the machine.  Try that for a whole morning or afternoon – whoa.  There are other stretches and contortions.  Sewing pilates is real! 

I also sewed a BBQ grill cover for the new griddle and did a few other repairs.  A new outboard cover is coming soon as well.  

Wednesday, October 11, 2017

Boat Bling - New Galley Faucet

New bling

Oct 2nd 2017
Who doesn’t like new bling?  Who doesn’t like new boat goodies = gear, tools, toys, stuff?  Combine the two and you have a winning combo sure to please. 
Old faucet

Our old galley faucet was pretty rough.  The environment we live in had taken its toll.  The surface was pitted and when we returned at the end of this summer, the head was stiff and didn’t want to swivel.  Part of this was my fault.  I don’t think I will ever get used to the corrosion that takes place in this environment.  It still catches me by surprise.  Turns out many “marine grade” things that are supposedly maintenance free, actually need special care and on-going maintenance despite the manufacturer’s claim.  Additionally, the design of this galley faucet was terrible…..as is MOST faucets.  It makes NO sense to me that the majority of faucets are designed so that once you are done using the water and reach to turn the handle/handles, the water from your wet hands pools behind the faucet leaving a mess to clean up each and every time.  What genius came up with this stupid design?  Seriously, think about most public bathroom, the sink area is a wet mess because the water shut off knobs allow water to pool on the counter and eventually, (after enough people) run all over the counter.  Even high end, poshy posh faucets do this if they are part of that design group.    The best faucet in my opinion is single lever, leaves no water mess.  Yeah, it is a pet peeve of mine.  I despise that water mess.
Ugly
Anyway, we have been casually looking for a replacement faucet for some time.  A fellow Caliber 40 owner replaced his last year with a nice, modern, single handle faucet.  Oh…..maybe we should get one.  We never quite got around to locating one.  He sent a message at the end of this season “Don’t bother.  It was rubbish and it has began to corrode.”  Bummer.  We would keep an eye out for one but this was not a MUST do project.

And then we found it, the perfect faucet.  We took an extra day in Ft Lauderdale FL when flying back to sv Honey Ryder in September.  I don’t like the stress of flying straight through, worrying about making an international connection.  It also makes for a really long day.  And we don’t have a schedule, so why do it.  Besides, the extra day gives us a chance to do some last minute boat odds and ends shopping on Marina Mile.  *Yes, it is really called that! 
Shiny 

We went to Sailorman in Ft Lauderdale.  It is a huge warehouse place that sells primarily second hand stuff, closeout items and open box items.  All sorts of stuff in various condition from new in the box to really beat up.  You just never know what you are going to find in there.  We walked the isles slowly looking at all things boatie.  Near the end there was an entire table of galley and head faucets - HIGH END  faucets.  I mean really good stuff, top quality with a simple yet sophisticated design.  The perfect design – one handle, no mess!  This stuff looked like it belonged on a mega yacht.  NICE stuff.  I looked at the price.  WHOA!  Yep, mega yacht stuff.  Tom walked up next to me.  His eyes light up and he looked at me.  “I know!  But this is NOT in our budget, trust me!”  His smile faded.  The Sailorman sales girl (that is a mouthful to say) said “The manager Rob over there just sold something off this table at a big discount.  Make him an offer.”  I turned to look at Rob thinking even if……..there was still no discount that he would approve that we could afford.  Before I could say anything, she said “Hey Rob.  She wants this one.  How much will you sell it for?”   Oh boy, here we go.  Rob came over, looked at the shiny, beautifully designed galley faucet and said “Hum…..$50 bucks.”  Wide eyed with mouth dropped open as well, I looked at Tom.  He quickly said “SOLD.”    Later we carefully wrapped our new galley faucet in clothes so it wouldn’t get scratched and Tom put it in his carry-on bag. 
NICE

A few days after our return home to sv Honey Ryder, Tom installed the new galley faucet and we have been enjoying it ever since.  It is perfect!!  AND no watery mess on the counter behind.  YAY!!!!  I would like to think I learn from history so despite the high quality of our new fantastic faucet, I wanted to be sure I knew how to take care of it – chrome plated brass.  To my surprise – no paper or fibrous towels.  D-oh.  On the old one, we usually wiped it down with those blue & white fibrous, disposable towelletes.  Recommendation is to use a soft, natural towel, no harsh chemicals.       

The installation?  Don’t forget in 2013, Tom cut a big access panel behind the galley sink area in the settee seatback.  See here if you want a reminder.  This made removal of the old and installation of the new much easier.